Sarah Blackbourn Sarah Blackbourn

DIY Market Display

DIY Vendor Booth Display for Markets

You know when you go to street fair, farmers market or festival and you see someone with the most aesthetic booth built into their 10x10 market tent? I have always been drawn to booths like that, so I decided to create my own. For the past 2 years, I have been selected as a vendor in the Peter Anderson Arts Festival in Ocean Springs, MS as a wood artist. My first year, I didn’t spend too much time on my booth because I needed to focus on my inventory and see how my pieces sell and do some configuring with how to display large pieces. By the time year 2 rolled around, I had envisioned what I needed to make it happen. A few things to keep in mind were low budget, packability for storage in my garage/workshop, AND most importantly, being able to fit them in my SUV along with all of my other market items to transport to markets. Here is what I came up with and a few step by steps of the process. If you’re more of a visual person, checkout my playlist on TikTok called “DIY Vendor Display” to see the process.

Supplies

  • Plywood (I used 1/2 in birch)

  • Dowels (I cut down wooden clothing rods)

  • Zip ties

  • Wooden rounds to cut in half for feet for the stand alone panels

  • Hinges

  • Sand Paper

  • Paint, stain, clear coast sealer (optional)

Tools

  • Circular saw or table saw to rip the plywood down to size

  • Jigsaw to round the corner and cut shelving grooves

  • Drill

  • Drill bits including 1 inch wood boring spade bit (like this)

  • Miter saw is optional to cut the dowels down, or you can use the jigsaw

  • Sander or sanding block

Tent/Canopy

HERE is the tent I have since so many people have asked for it. I cannot say enough good things about this one. I have gone through MANY canopies and tents throughout the past 15 years and this is by far the best one I’ve had. Trust me, spend the extra money now, save tons of money in the long run not having to replace it. I bought mine summer of 2021 and its gone through several markets, storms, camping, etc. It’s easy to open and close, doesn’t pinch you, sturdy, comes with walls for rain and shade, and it’s very easy to get back into its heavy duty roller bag. FUN FACT: I was recently camping in Georgia with my family, we had three canopies up, including mine, and it stormed throughout the night. The ONLY tent still standing was mine :) The others unfortunately crumpled, including our sleeping tent.

Check out my easy to shop Amazon List of tools and supplies specific to this project!

Step By Step How To:

Corner Panels:

  1. You can make as many of these as you want. I did a set of panels for all four corners of my tent to maximize space. You’ll need 1 4x8’ sheet of plywood for each corner. I’ll walk you through one panel and you can repeat however many times you like.

  2. Measure and cut your plywood to fit your needs. I started by measuring my 4x8’ sheet to 70 inches, cutting 26 inches off the end. And then I ripped the remaining larger piece in half. Keep in mind the height of your canopy. 70 inches was the perfect height for the panels to touch the bottom of the canopy cover at the middle height setting of the tent.

  3. Now you have two 24x70 inch pieces of plywood. Pick which sides you want the top to be, and using a bowl or something round as a stencil, draw a curves edge on one corner of each. Make it so they mirror each other so that the insides and the outsides match the wood grain. Use a jigsaw to follow your stencil line to round the edge out.

  4. Now you have two panels with a mirrored rounded edge on one side of the top. You will want to lay them side by side and attach your hinges.

  5. Now that the hinges are attached, close the two panels together so they are flat. Draw out your grid to know where to drill the dowel holes. I used a scrap piece of wood and created a stencil so that I could use it on each panel and they’d all match up. You can also add your shelf line if you want to add shelves. Make sure you give yourself space between your shelve and your dowel holes based on what you will be displaying on them.

  6. Using a drill bit that matches the size of your dowels, drill halfway through each hole. I only drilled far enough down to pierce the second panel underneath it, and then flipped everything and continued drilling the other way. This allowed me to make sure all of my holes were lined up and it produced less tear out and splintering.

  7. If you are adding shelves - use a jigsaw to cut out your shelf groove. You can use your spare plywood to cut the shelves out.

  8. Fold your panels together again. Using a big enough drill bit for a zip tie to slip through, drill a hole in the top, middle and bottom of the hinged edge. About 1 inch in from the edge and a few inches from the top and bottom. This will give you a place to run your zip ties through to attach to the tent.

  9. Sand all of your raw edges using a sander or sanding block, or just sand paper. Be very careful not to use too much pressure and sand away the top layer of the plywood. I rolled a piece of sand paper the sand the inside of the holes.

  10. Paint, stain or clear coat your panels. I only used a clear coat keeping them the natural color. At minimum, you want to clear coat them to help protect from damage and rain.

  11. Cut your dowels to your preferred length. I cut some at 6 inches and some at 8 inches for different placements. You can also use a jigsaw to cut a little groove into the ends of your dowels to prevent items from sliding off. I also used hair claw clips to keep my lightweight bags from flying off in the wind.

Setting Up:

Setting up the panels should be pretty easy. You can either put the panels on the outside of the tent pole or on the inside of the tent pole. Wrapping the panels on the outside provides more support, however, we noticed it was harder to zip our walls up when we had a rain storm come through. If you have nice weather, I suggest putting them on the outside of the poles. Run your zip ties through the holes you created and around the poles and pull tight, making sure the panels are sitting at a 90 degree angle on even ground. We had to zip two zip ties together to get the length, or buy longer zip ties. If you run into uneven ground and the panels are swinging a bit, you can place a shim under it to lock it in place. The market that I do is in the street, so we aren’t able to stake our tents down. Our solution was to hang 25 lb plate weights on each corner with a thin toe strap. This method worked beautifully, even through a heavy storm. It wasn’t as appealing to the eye, so next time I will try to disguise the weights a little bit better. Also, keep in mind that if you have weather and need to put your walls up, you’ll want to move your inventory inside the booth and pull the dowels in towards the center so the walls can fit properly.

Stand Alone Panels:

  1. I made these using the scraps I cut off from the corner panels.

  2. Do the same process. Cut them to size, round the corners, drills holes, sand, clear coat.

  3. For the base - I cut wooden rounds I bought at Lowes in half and then cut a slit into the middle of the rounded side. I matched the slit on the bottom of the panels giving them space to lock together. I painted my “feet” black just for the aesthetic of it and also for people to see them and not accidentally trip.

Display Signs:

I made my display signs cutting PVC and adding an elbow. And then I added an end cap so the sign would slide off. I spray painted the PVC black and used zip ties to hold it to the corners of the booth. I then used zip ties to hang my wooden sign the frame.

Click the images below to go straight to the video!


Additional Images

 
Read More
Sarah Blackbourn Sarah Blackbourn

Easy DIY Raised Garden Bed for under $25

How to build a super easy raised garden bed for $25!

Last spring, I made it my mission to learn some gardening techniques. I’ve never had a green thumb, in fact, I usually kill everything I plant. So there is a lot of room to learn. But I wanted to use my skills that I do know and build myself some raised garden beds to get started. I’m still working on my gardening techniques, as much of my plants didn’t make it through the winter (I live in Coastal Mississippi and we had a few freezes this winter), but what did last? My garden beds :)

I started by making one for myself, figuring out the cheapest, most economical way to make these, without leftover scraps. I also wanted to make sure that I was using untreated wood. That may be a controversial statement considering untreated wood doesn’t stand up to the elements like treated wood, however, it’s more important to me and my family to introduce less toxins and chemicals to the food we grow. I’d rather have to rebuild these in a few years (or maybe longer, we shall see) than be eating the chemicals that seep into the soil and feed my plants. No judgement if you decide to get treated wood, or paint/stain yours, do what’s right for you! Cedar is naturally resistant to rot and decay, plus its a deterrent for pests.

I’ve done a few videos on the process, so if you are a visual person, they are linked below. Here are the written steps.


Tools and supplies:

  • Saw (miter, circular or jig saw will do)

  • Table saw (if you don’t have a table saw, see below)

  • Drill

  • Square

  • Exterior wood glue

  • 2 inch wood screws

  • 1 inch wood screws

  • Drill bit for the screws (usually the package comes with a drill bit)

  • Pencil or pen

  • Tape measurer

Materials:

Cut List:

  • Long Side - (4) 1x6 pickets at 6 ft

  • Short Side - (4) 1x6 pickets at 17.75 in

  • Corner Supports - (8) 1x2 at 11 in

  • Middle Supports - (2) 1x1.5 at 11 in

  • Long Trim - (2) 1x2 at 72 in

  • Short Trim - (2) 1x2 at 19 in


Step 1:

Make your cuts according to the cut list above. You can leave the dog-eared side on, or you can cut those off and adjust accordingly. Rip 2 of the pickets into 3 sections each (1x2, 1x2 and 1x1.5) will be used for trim, corner braces and middle braces. The remaining 5 pickets will make up the long sides (4 pickets) and short sides (1 picket).

Step 2:

Once all of your cuts are made, you can start assembling everything. Start with the short sides. Add one corner support to the edge of two short side pieces with enough overhang to screw into the long pieces. This will be 5/8 in if you want it perfectly aligned. Using a square will help you line everything up, pressing down as you screw the 1 inch screws in. Repeat this for the other corners on the short sides, and then again for the long sides. Lastly, add your 2 middle supports in the middle of the long sides.

Step 3:

You should now have four sides with corner supports, two short sides and 2 long sides. Lay a long side flat on a table so the corner pieces are on the back closest to the table. Screw a short side into the long side and repeat the screws on the long side for added security. This should make an L shape. Now that it will stand up on it’s own, add the second long side screwing in the same places. Then add your last short side, making sure to overlap the corners the same way you did on the first side. Now you have a rectangle box. You can use glue along the way.

Step 4:

Now add your trim around the top. This gives the box a nice finish and also a lip to grab on to. Use the 2 inch screws to attach making sure to screw into the base.

Step 5:

You can add a base to this if you want, but I designed mine to go directly on the ground and I use garden cloth on the bottom.


If you don’t have a table saw:

You can buy 1x2x8’s in lumber. This size will work for the middle and corner supports as well as the trim around the edge. If you go this route, you can probably get by with just 5 cedar pickets instead of 7.

Here are some slightly bigger ones I made…

Read More
Sarah Blackbourn Sarah Blackbourn

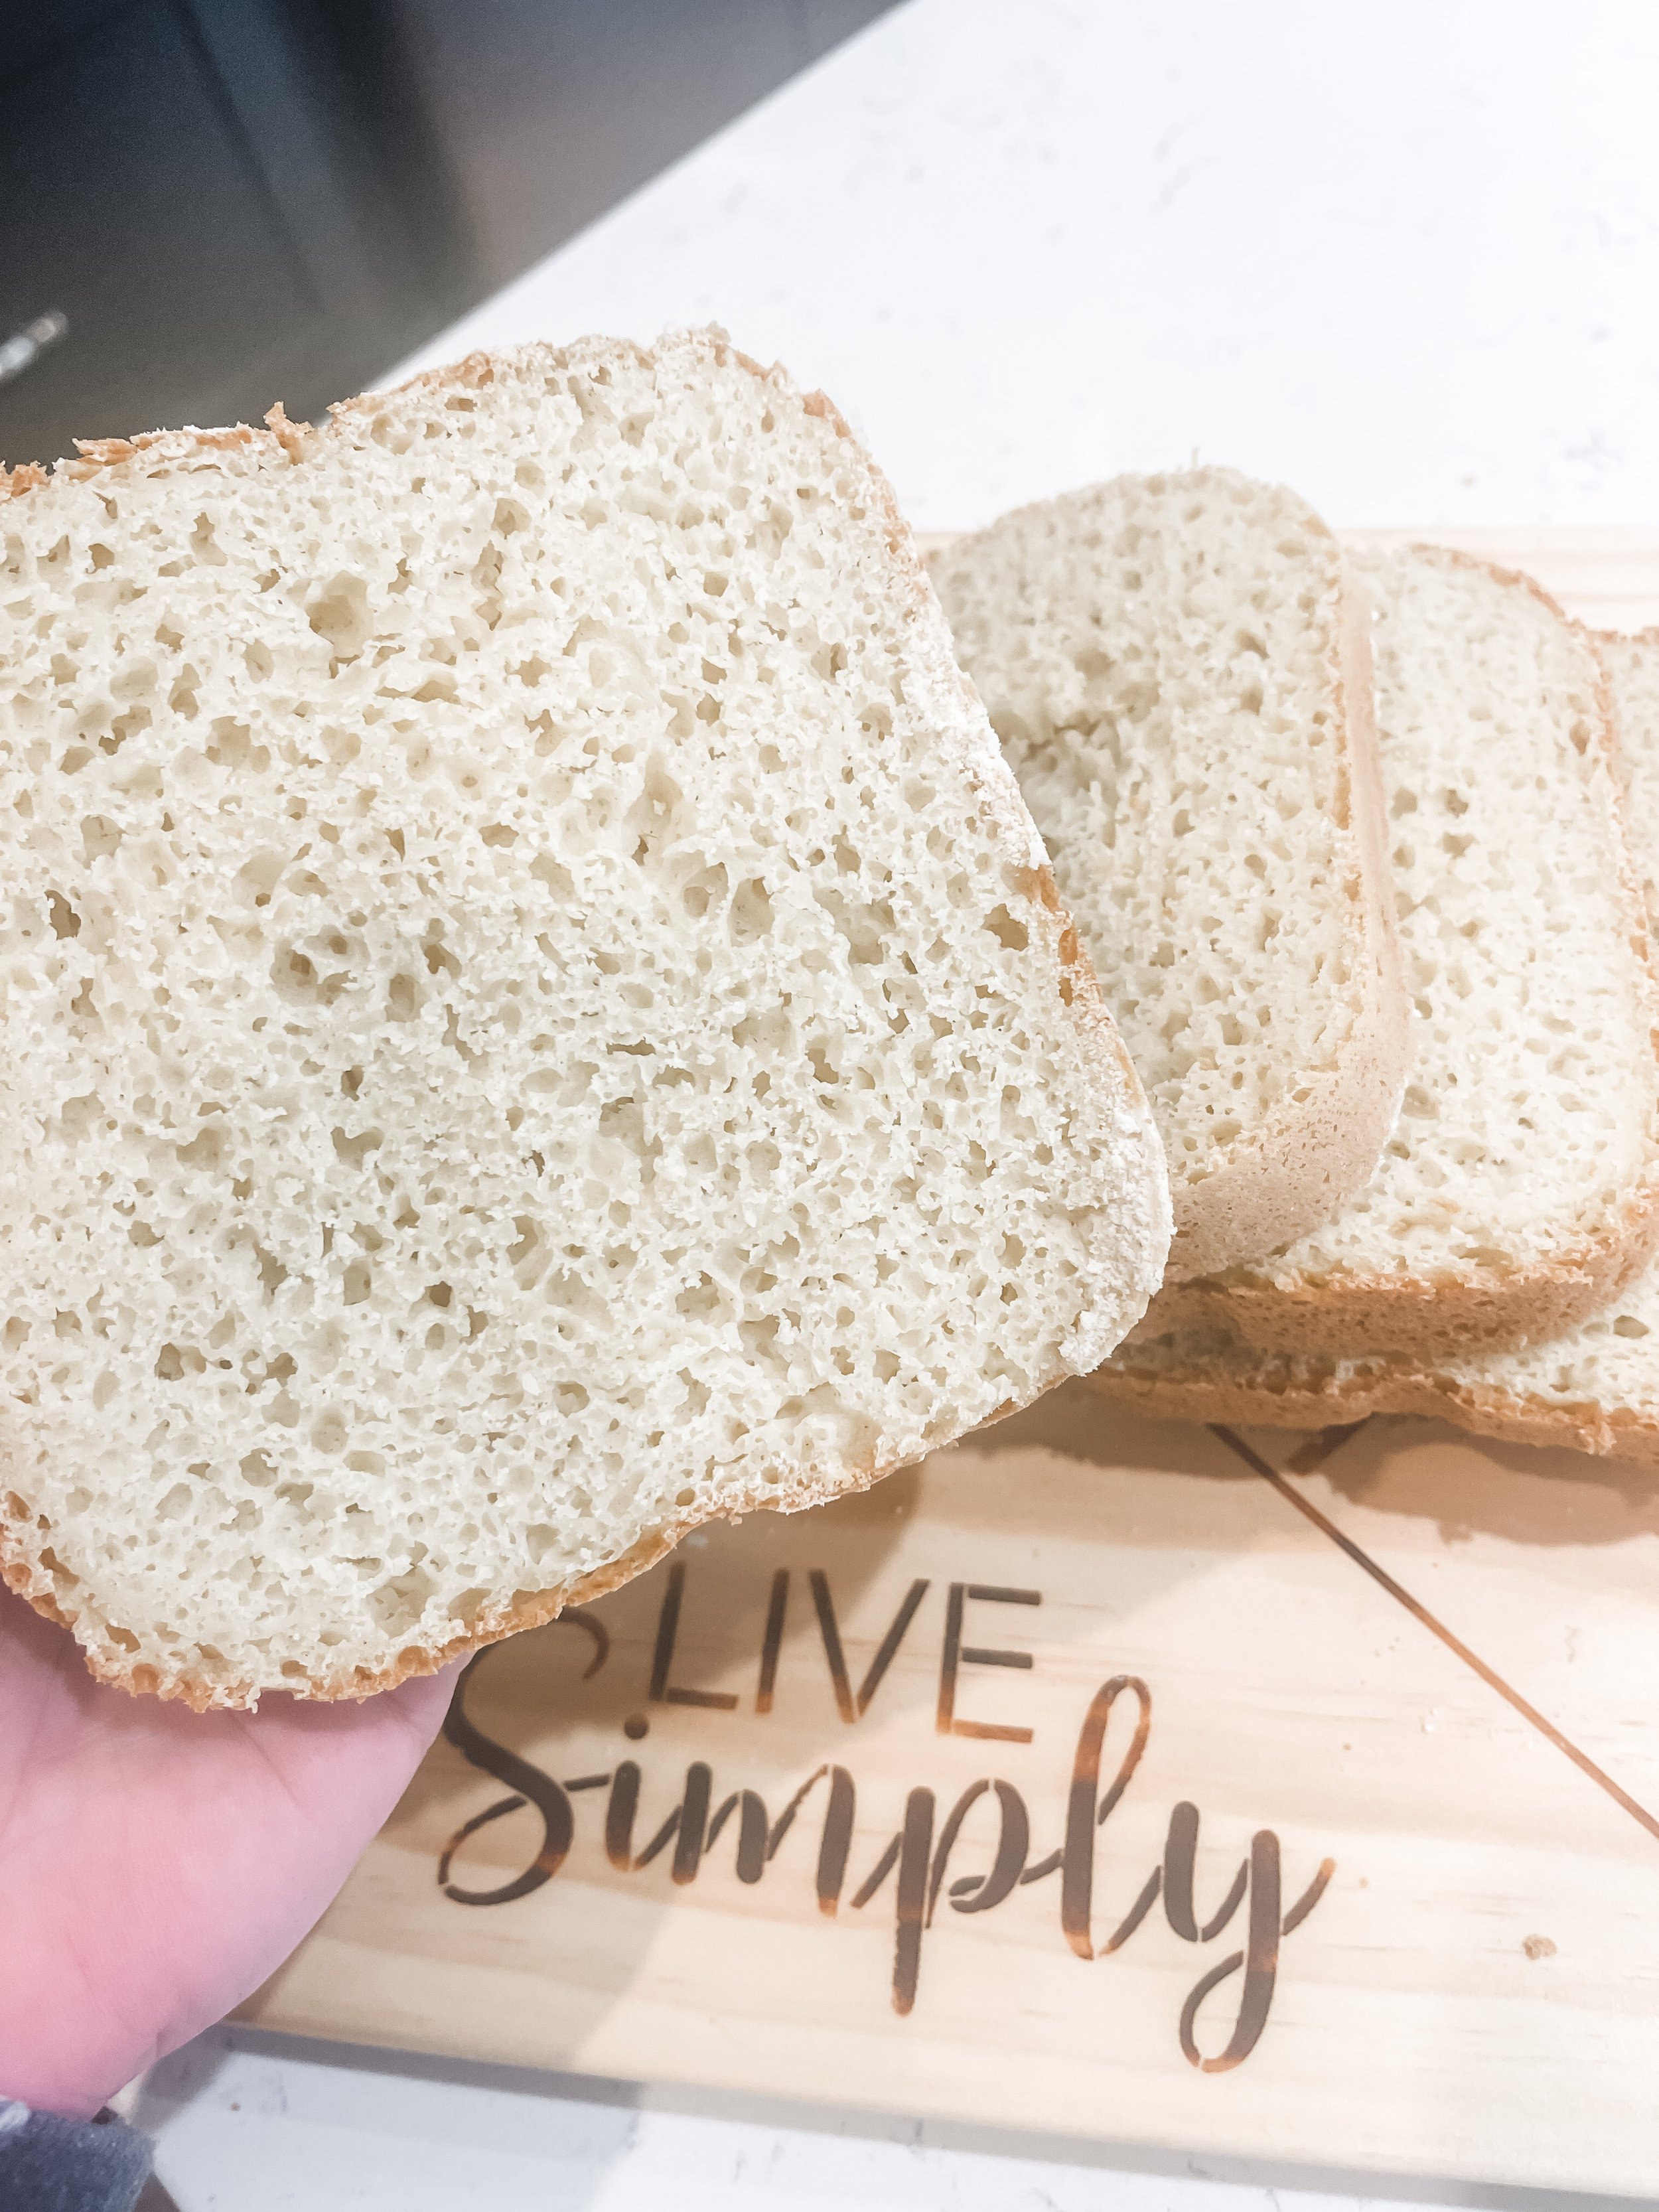
Easy Gluten Free Bread in the Bread Maker

Easy Gluten Free Bread Recipe for Beginner Bread Makers using a Bread Machine

I’ve been gluten free for over 10 years, which will forever be my way of life. I don’t eat a ton of bread in general, but I hate spending $6-10 on each loaf from the store. I’m trying to make everything from scratch to save money and know exactly what’s going into my body. I got a bread machine for Christmas and my first two tried, they turned out like bricks. Flavor and texture was way off. My sister has also been trying different recipes in her bread machine and she came up with the perfect, easy bread recipe!

Here is the bread maker I have which came from Amazon. We have not tried this recipe in the oven so go at your own risk and let me know if you try it! Bread maker’s are so cool because it handles every step for you. You just add all your ingredients and press go. Easy Peasy!

To see the whole video and process CLICK HERE

Ingredients:

  • 1 1/4 cups of water (room temp)

  • 1/4 cup oil (I used extra virgin olive oil)

  • 3 eggs (room temp)

  • 1 1/4 tsp salt

  • 4 Tbsp sugar

  • 3 1/4 gluten free flour (I use THIS, just make sure it has xanthan gum)

  • 2 tsp active dry yeast (I use THIS, but it’s cheapest from Walmart or grocery store)

Instructions:

  1. Measure our all of your ingredients and set them out to reach room temperature

  2. Make sure your paddle is placed in the bread maker

  3. Add wet ingredients in this order: water, oil, eggs (I cracked and lightly stirred my eggs before I added them)

  4. Add dry ingredients: gluten free flour, salt, sugar

  5. Make a small well in the center of the top of the flour and add your yeast. Do not stir or let yeast touch the wet ingredients

  6. Close the lid and start up your machine. Here are the settings I used, however, your machine might be different than mine, so adjust accordingly.

    • Setting 7 - or the Gluten Free Setting if it has it

    • Change color setting to “Light”. GF Breads tend to darken faster than regular breads

    • Change the weight setting to 1.5 pounds

  7. Hit Play/Go and let it do it’s thing! Mine takes 3 hours on this cycle and smells SO DANG GOOD!

I have learned over the past few weeks that a lot of variables can go into making bread. Temperature. Altitude. Weather. Order in which the ingredients touch… the list goes on. I find that taking notes along the way has helped me improve my recipes. Let me know if you try it and how it turned out!

Enjoy!

Read More
Sarah Blackbourn Sarah Blackbourn

Easy DIY Patio Couch and Coffee Tables

Easy DIY Patio Couch on a Budget - Beginner Friendly

In May of 2021, I had some friends coming to visit short notice and was in despirate need of some patio furniture. Of course, during this time, shipping was backed up and I wasn’t finding anything locally that was in my budget and could withstand the test of time (and hurricanes). I decided to build a very budget friendly couch and coffee tables myself. I was very new to building furniture so this was a big step for me. I scoured the internet and pinterest and found Ana White. She has plans for TONS of projects on her website, easy to follow, including a cut list, measurements, diagrams, and cost breakdown (this varies greatly with location and time). The instructions were very easy to customize the measurements on to fit my space and size couch cushions I had purchased. It took me about 5 hours total to build the couch and about 2 extra hours to build the coffee tables.

Ana White Plans for Outdoor Sofa

Ana White Plans for Outdoor Coffee Table

Notes and Tips I learned from my build:

  • Purchase your cushions first, then build the couch based on those measurements. I got my cushions from AT HOME on sale

  • Print the Ana White instructions so you can make notes and edits as you go

  • Buy all your materials based on your modified cut list so you know exactly how much it cost and don’t have to make several trips

  • Make all of your cuts at once, then sand, then stain everything BEFORE building the couch

  • I use off-brand melamine sponges to stain (they are like Mr. Clean pads or magic erasers), and then wipe up extra stain with a cloth

  • Use a pocket hole jig, I didn’t have one, but I wish I had bought one. I use it all the time now.

  • Build your couch in the space you want it to be, unless you can have help carrying it. It’s heavy!

  • Use a poly or sealer on it. I found a spray sealer that was easy to apply.

  • I built the coffee table plan linked above but modified the measurements to build two squares instead of one rectangle. Those two tables can be moved around to become the chaise lounge of the sectional.

My favorite products used in this build:

Read More
Sarah Blackbourn Sarah Blackbourn

Easy DIY Entryway with Decor Ledge

Easy and Budget-Friendly DIY Entryway Accent Wall and Makeover

Revamping the entryway to your home is a really easy way to add some DIY touches to make it look upscale and welcoming. There are tons of ways to do this, but I am sharing how I recently helped my bestie DIY her entryway. I’ll cover the step by steps, but if you want to see more, check my Tiktok and Instagram for more ideas and DIY tips.

Tools Needed:

Supplies Needed:

  • Lumber (we used 1x1’s on the very bottom, 1x4’s for the vertical slats, a 1x4 for the top horizontal slat, and a 1x2 for the ledge)

  • Brad Nails - I like this variety pack to keep on hand, but get the correct length to go through your wood and into the wall about 1/3 of the way

  • Liquid Nails (or a similar product, found at your hardware store)

  • Caulk

  • Spackle

  • Paint (we used Bay Water by Behr in eggshell)

  • Paint brush and roller

  • Painters Tape

Step 1: Measure your space

Make sure you measure your space before you get started. Decide how many vertical slats you want and how tall you want the ledge to sit. Keep in mind to space your verticals around any outlets, making sure they will be equal distance apart. Make a cut list to take to your local hardware store.

Step 2:

Add a border at the bottom, above the trim. This step is completely optional, but we did this to give the verticals a smooth place to sit. We also knew we didn’t want to paint the trim, so it gave us a nice separation. We used 1x1’s we found at Home Depot. They were only 4 ft long, so we bout 3 and pieced them together. Make sure to sand the ends for a cleaner finish. We attached the 1x1’s to the wall with a strip of liquid nails (glue) and brad nails.

Step 3:

Measure and cut your verticals. Because we used 1x1’s on the bottom, the 1x4’s butted up nicely to the bottom. Be precise in your cuts making sure each slat is exactly the same height, so when you go to add your ledge, it sits flush. Use liquid nails and brad nails to attach the vertical slats. Make sure you’re plumb (level) ;using your hand leveler or laser level and spaced evenly. We started in the middle and worked our way out to the sides since we have 5 vertical slats total.

Step 4:

Measure and cut your horizontal top piece. Attach the same way you did before. Measure and cut your ledge. For this piece, we used liquid nails on the wall side and on the top of the horizontal piece, and then used the nail gun to attach it to the horizontal 1x4. So the nails didn’t go into the wall for this step.

Step 5:

Caulk all of your seams and spackle your nail holes. Once that dries, lightly sand the spackle smooth. Dust off your space and you are ready to paint.

Step 6:

Tape off and paint! We used Bay Water by Behr in eggshell finish. Our space only took a quart, and we did two coats.

Read More
Sarah Blackbourn Sarah Blackbourn

DIY Sliding Barn Door for under $200

DIY Sliding Barn Door for under $200


I’m going to be completely honest with you. I didn’t do a lot of research when I decided to do this project. I just knew that I wanted to replace our master bathroom door with a sliding door for two reasons. Primarily to solve our multiple door situation. We have a shower door and a toilet room door as soon as you walk into the bathroom within a few few. So removing the hinged door that swung in was going to solve the crowded situation. Secondly, I wanted the sliding door to look modern and more like an oversized piece of art. I’m not keen on the farmhouse looking doors. No shade to those, it’s just not right for the style of my home. Therefore, I came to the conclusion that I’m going to have to build this bad boy myself, and make it budget friendly because who doesn’t want to save money?


Here are the tools and supplies that I chose to use. You can easily swap out tools or types of wood for this project. I used the cheapest options I could find at my local hardware store. Also, this is what I used to make my specific design. You can copy it exactly if you like, or get creative with your own!

Tools you need:

Supplies:

  • Wood Glue

  • Stain (Weathered Oak by Minwax is what I used)

  • Throw away rag for stain or use these off brand magic erasers

  • Disposable gloves

  • Clear Coat (Here is what I used, probably cheaper from Lowe’s or local hardware store)

  • Paint of choice - I used Black Fox by Sherwin Williams

  • Sand Paper

  • Wood:

    • 1) 1/2 inch plywood (full sheet 4'x8' or use your existing door)

    • (1-2) 1/4 inch plywood (I used 1 and half sheets, but you can buy less for less coverage)

    • (4) 8ft 1x4 (or similar to trim back)

    • (1) 1x4 for the "headboard" if needed

  • Hardware

Amazon - Rail Kit

Amazon - Rail Kit (does not come with door!)

Amazon - Floor Guide (that attaches to wall, not floor)

Amazon - Door Pull with Grip Plate

Step 1:

Lay everything out and make you have all of your parts.

Determine if you need the headboard piece based on the instructions the kit came with. Basically, it sets the rail off the wall enough so your door doesn’t hit the moulding around your doorway.

Follow kit instructions to install the rail system to your wall.

Notes: I bought an 8ft 1x4 and painted it black (the same color I used for the door) making it look like it's part of the rail system. I installed this right into the studs making sure to overlap my door frame and measuring the right height based on the plywood. I hung mine an in higher than how tall my sliding door was to leave room at the bottom to slide. Remember, measure twice, cut once!

Step 2:

Once your rail system is installed, it’s time to work on the door! I used a full sheet (8’x4’) 1/2 inch plywood for this. You can choose to work with your original door if thats the right size for you, or any other wood you have on hand. I chose to use this because I wanted it to be as big as possible for my space and inexpensive. Lay the body of the door on a surface you can work from. I used a folding table.

Lightly sand your door face to prep for paint or stain. I used a cordless orbital Sander but you can also hand sand with paper or a sanding block. Grit doesn’t matter so much, but I usually start with 80 grit and move to 220 grit. Make sure you get a smooth surface on your edges.

Paint or stain your door face before the slats go on including the edges. I used 2 coats of Sherwin Williams Black Fox and let dry completely. This is what will show through the slats, so it’s just personal preference.

Step 3:

Once your paint is dry, measure your center point by measuring half width and half height and drawing a line to cross in the middle with a pencil or chalk. Like the image on the right. This is your guide to make the V-shape in the middle.

Step 4:

Rip 3 inch strips from your 1/4 inch plywood. I HIGHLY recommend this Kreg Rip Cut if you don’t have a table saw. It attaches to your circlular saw and acts as a guide allowing you to make even cuts every time.

NOTE: If you don't have a rip cut jig, or a table saw to rip these cuts, you can also do them by clamping a long piece of wood to each end giving you a wall to run your saw next to. A second set of hands is recommend to help keep everything in place.

Be sure to rip the plywood in the same direction, longways, each time so the wood grain is going same direction. Rip as many strips as you can so you have 8 ft strips. I used 2 sheets of plywood to get as many as I could. Then I cut my leftover plywood in half to make it more manageable to rip more strips, just shorter.

Step 5:

It's time to start laying out your design. Start in the center and take one of your 8 ft strips and measure how long you need it to be at the angle. Cut a 45 degree angle with your miter saw (use a jigsaw if needed, but make as straight as possible). Use a speed square to help determine the angle of the large middle section

PRO TIP: Save time and cut two strips at once to mirror each other. Just sandwich the two strips together (make sure to put SAME sides touching, so you don't have one back and one front) and cut with miter saw at your angle.

Finish your cuts for the middle triangle section before moving on to your vertical cuts. Measure and cut your longest strips first and then work down to minimize waste. Use the tile spacers as you go, just for a guide.

Don't worry about the slats hanging off the edge. Those will be trimmed up later all at once for a clean cut.

Step 6:

After everything is cut, before you place all of your slats down, sand the edges. I tried three methods of sanding, and I got the best results using a piece of sand paper folded in thirds. Make sure to smooth all of the rough edges including the angle cuts. Again, don't worry about the slats hanging off the edge, those will get trimmed down once everything is secured down. I used 80 grit for this step, but you can really use any grit for edges.

Step 7:

Once you have everything cut and laid out in your design, use the tile spacers to make sure everything has even spacing. At this point, you can start glueing if you choose to use glue. I did, however, it froze overnight and the glue didn't work well (it was water based). I then went through with a cordless brad nailer and 1/2 inch brad nails and put 2-3 nails in each slat.

PRO TIP: Clamp a straight edge down to line your nails up nicely. They are barely noticeable but it does help the design element!

Step 8:

Wait for the glue to dry before pulling up the tile spacers and trimming the edge. To trim the edges, I used a jigsaw on the top and bottom and the circular saw on the edge the the triangle hanging off. I found that the jigsaw made cleaner cuts. Use clamps and a straight edge to guide your saw.

Learn from my mistakes! This is what the circular saw did. I think I could have prevented this if I laid a piece of wood over it before cutting, OR if I had flipped it over first. It was too heavy for me to flip by myself. I ended up replacing these pieces that got torn up.

Step 9:

Sand the edges that you just cut until smooth and even with the back. Using a brush, rag or a blower, get rid of all the dust to prep for stain. I only used one coat of Minwax Weathered Oak. Make sure to stir this stain thoroughly before using, do not shake it! Let dry, and then apply a clear coat according to the instructions.

Pro Tip! Use off-brand magic erasers (melamine sponges) to apply stain. I tear them in half for limited waste and toss them when I'm done. I always wipe up any excess stain with a rag.

Step 10:

Once the front is completely dry, flip the whole door over. Trim out the back with two 8 foot 1x4's and cut the third 1x4 to size to fit the top and bottom. Lastly, I added trim right through the middle. I secured these with glue and a nail gun. Clamps help will measuring and drying.

NOTE: Make sure to run the long pieces vertical and then fill in the top and bottom. That way you don't have exposed edged on the sides of the door that are seen.

See diagram below.

Paint the entire back how you desire, including the edges. I painted mine Black Fox by Sherwin Williams that I used on the front and the rail hardware.

Pro-Tip! Wrap your roller in press and seal wrap in between projects or overnight if you still have work to do. This helps it not dry out and also holds in your paint thats on the brush, less waste, less mess, and a huge time saver!

Step 11:

Add your hardware! I had to get help with this next part because the door weighs maybe 80 pounds. I opted to add my hardware while it was leaning up next to the rail. I HIGHLY recommend this method because it helps to get the wheels exactly where we wanted them. Make sure you put the wheel brackets on the thickest part of the door so the hardware fits correctly. This is precisely while I ordered this specific kit and used the cuts of wood I did.

Pro-Tip! Place some scrap wood underneath the door on each corner to boost it up to the height you want while putting your hardware on. I used two pieces of 1 inch thick wood. Kick them out once you hang the door.


Admire your work!

For under $200, I am super impressed by this project build! Honestly, I couldn’t have found a door this big in a style that I wanted. Let me know what you think and if you try it! I’d love to share pictures of your door on my instagram, so DM if you make one. And as always, reach out to me through email, instagram or tiktok if you need help!

Read More
Sarah Blackbourn Sarah Blackbourn

DIY Writing Desk with Storage

DIY Desk (West Elm Dupe)


When I decided to remodel my husbands home office while he was out of town for work (as a complete surprise to him), I knew I would need to build a desk, from scratch, to put in the middle of the room. I needed to it be specific dimensions to leave enough room to walk around it completely. I also wanted it to be pretty deep, for a large work surface, and offer a little bit of storage to minimize the clutter that can be seen. I made a list of what this desk needed to be:

  • Look masculine and well made

  • Be no wider than 58 inches, and at least 24 inches deep, and 28-32 inches in height (standard sizing for desks)

  • Be extra sturdy, especially because it wasn’t going against a wall

  • Offer storage

  • Low cost, this whole room was on a tight budget

  • Repurpose old desks to save money and be resourceful

After doing some research, I found this desk online that I just loved the look of, but was definitely out of my budget (nearly $1000)! Here are some pictures below of the West Elm desk I sort of used as my inspiration. I looked for the link, but I don’t think its available anymore!


The room already had two desks that my husband was using that I had built quickly when we found out he needed a home office. It was one of my first building projects, and I didn’t have nearly as much experience as I do now. The tables (desks) were a little wobbly and felt more like folding tables, rather than actual sturdy desks. So, I repurposed those by completely taking them apart, and using the wood for the new desks. In this tutorial, I will explain how to do this starting from scratch.

Tools you need:

Supplies:

Cut List:

  • 2 - 24” x 58” stain grade wood panel in 3/4 inch thick (I buy THESE from Lowes) This is for the top and bottom of the desk, so if you are modifying it, get wood accordingly

  • 1 - 4” x 56.5” x 3/4” wood for the back (note - if you want the desk to be shorter, make this 3 inches wide instead of 4 inches wide)

  • 2 - 4” x 22.5” x 3/4” wood for the sides

  • 1 - 4” x 21.75” x 3/4” wood for middle support (you can add a second support if you want three cubbies instead of two)

  • 2 - 4” x 3” x 1/4” wood trim for the outer edges (option and you can trim with anything else, just cosmetic)

Step 1:

Ensure that you have all of the necessary tools and supplies to get started. Start with making your cuts from the cut list above. The desk is completely customizable to the size and depth that you want, so adjust your cuts accordingly.

Step 2:

Sand each cut edge and surface of your wood to prep for stain. I usually start with an 80 grit and work down to a 220 grit until it feels smooth. Add pocket holes to the left and right sides, the back sections, and the middle support. I used the Kreg Pocket Hole System to help give me the angles to screw the sides and support into the bottom of the desk.

Step 3:

Stain all pieces of wood (including all sides and edges) with your choice of stain. The stain I chose is Puritan Pine by Minwax and I use it often in my artwork and other projects. I love the natural look. I always use these off-brand magic eraser pads to stain. They work perfectly for all size projects. When staining smaller pieces, I cut them in half or fourths, but for this project, I used a whole pad, dipped it right into the stain can, applied it as evenly as possible, and then wiped off the excess stain with a clean rag (or use paper towels). I throw the magic erasers away when finished because stain is very hard to clean up. Also - grab some disposable gloves before you begin staining to protect your skin. If you do get stain on your hands, mix half olive oil and half dish soap in your palm of your hand and scrub away in some warm water. It eventually comes off. I don’t think it comes out of clothes, but if you know something I don’t, please share! Let your stain dry for a few hours before moving forward.

Step 4:

Using wood screws and wood glue, attach the left and right sides to the top. Make sure not to drill through the other side of the top, as this will eventually be flipped and become the desk surface. The sides will line up evenly against the edge of the top. Attach the back section the same way, making sure to line everything up. Attach the middle support. Wipe away any extra wood glue.

Step 5:

Add wood glue to the exposed edges of the sides, back, and middle support. Carefully lay the bottom down and make sure everything is lined up properly. Use a brad nailer around the edges to secure the bottom. If you don’t have a nail gun, use some wood screws. Wipe away glue and let dry.

Step 6:

Carefully flip the desk over so the top is now facing up. Add optional trim to the edges using glue. Apply poly according to the instructions on your packaging. Make sure to get all edges and sides, but I mainly focused on the top so it would be sealed and smooth.

Step 7:

Attached legs of your choice! I purchased these off amazon and they were exactly what we needed. Very sturdy and well made!


Voila! A DIY desk that’s beautiful and functional. A piece that you can be proud of!

Read More
Sarah Blackbourn Sarah Blackbourn

The rug that everyone needs…

The rug that everyone needs….

Tumble Rug Review

#tumblebrag

I feel like good, long lasting rugs are hard to come by. So here I am writing my first product review blog because Tumble gave me something to write about! And for context, in the last 15 years, I have lived in 4 states and moved 13 times. Yes, thats 13 different apartments and homes we have lived in. And all of those years, we have had 1-2 dogs. So when I tell you I’ve put rugs through the test of time, I have put rugs through the test of time!

For the first 10ish years of my married, adult life, we were buying the cheapest rugs we could afford. And with the dogs, the rain, the sand, and just living life, they never lasted more than 2 years. In reality, if we had just paid a little bit more up front, we’d have a machine washable, stain-resistant, pet and child proof rug that would have lasted YEARS. I don’t like thinking about how much money we would have saved, and been more environmentally friendly by creating less waste. Trust me - don’t fall for the “fast fashion” type rugs that don’t last. Invest in a Tumble rug that will stand the test of time.

Here is my rating:

  • Clean-ability 10/10 - Spot clean with a damp towel or paper towel, The liquid from spills just beads right off . When it’s time for a good cleaning, it’s machine washable…need I say more? All of their sizes are machine washable. I have the runner and it fits into my washing machine like an oversized beach towel, plenty of room.

  • Durability 10/10 - The rug is low pile and hypoallergenic. Plus it’s free of harmful chemicals which is perfect for pets and children. It’s great for high-traffic spaces because its easy to keep clean.

  • Comfortability 9/10 - The rug itself is very thin, but that makes it easy for washing. The interlocking pad underneath is what gives this rug some cushion. It also grips the floor pretty well and keeps the rug in place with the pocket corners. I gave it a 9/10 because it’s not as cushioned as a standing mat in front of the sink, but lets be real, it looks way nicer that any foam mat. It’s actually pretty comfy!

View on TikTok

Taos - Neutral Tumble Rug

Read More